How To Prepare For A Wunda Rapid Response® Installation
Proper preparation is essential before installing a Wunda Rapid Response® underfloor heating system. Taking the time to correctly prepare the subfloor, review your pipe layout, and organise your tools and materials will help ensure a smoother installation, improved board adhesion, and long-term system performance.
This guide explains the key preparation steps that should be completed before starting your installation.
Step 1 – Review Your Pipe & Board Layout Plan
Before laying any boards, carefully review your supplied Wunda pipe and board layout drawing.
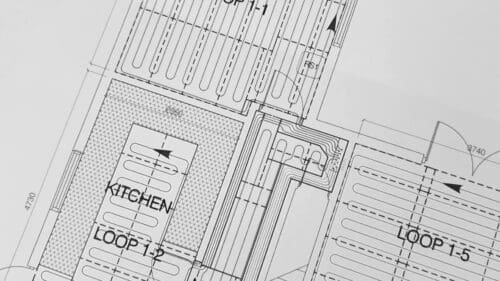
The bespoke system drawing shows:
- Board layout and orientation
- Pipe routes
- Manifold location
- Pipe loop lengths
- Areas requiring transitional or plain boards
Understanding the layout before installation will help reduce mistakes and improve installation speed.
Understanding Board Colours
Different board types are identified by coloured outlines on your plan:
- Blue outline – Starting board
- Black outline – Rapid Response® main boards
- Red outline – Transitional boards
- Grey outline – Plain boards for unheated areas such as beneath kitchen units
Pay close attention to the direction each board needs to face within each room. Identify any areas where boards may require cutting before starting installation.
Some shorter pipe loops may share a longer coil, so always review the pipe routes and loop lengths before beginning.
Additional installation support videos may also be available via QR codes included on your layout drawing.
Why Planning Your Layout Matters
Reviewing the layout drawing before installation helps:
- Prevent incorrect board placement
- Reduce unnecessary cutting
- Improve installation efficiency
- Ensure correct pipe routing
- Avoid installation delays once adhesive is applied
Planning ahead is particularly important when working across multiple rooms or complicated floor layouts.
Step 2 – Prepare The Subfloor
Wunda Rapid Response® boards can be installed onto:
- Existing or new screed floors
- Concrete subfloors
- Wooden floorboards
- Existing tiled or non-porous floors
Before installation begins, the subfloor must be:
- Flat and level
- Fully dry
- Structurally sound
- Dust free
- Free from movement or loose materials
Uneven or contaminated subfloors may affect adhesive performance, create movement beneath the boards, or lead to uneven finished flooring.
Some preparation work may be required depending on the condition of the existing floor.
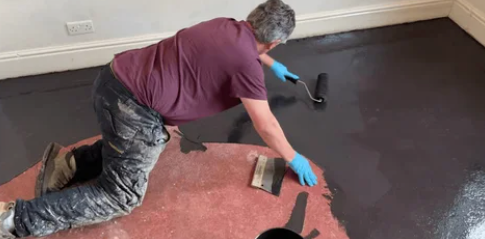
A) Preparing Existing Screed Or Concrete Floors
Concrete and screed subfloors must be flat, dry, and level before installing Rapid Response® boards.
On new screed floors:
- Ensure the screed has fully cured
- Remove any laitance (weak powdery surface layer)
- Vacuum all dust and debris before installation
Older concrete floors may require additional preparation to correct uneven areas or surface defects.
Important: Rapid Response® boards should not be bonded directly onto asphalt or bitumen surfaces. These floors should either be removed or covered with a suitable levelling compound before installation.
[image of concrete subfloor with alt text: Preparing concrete floor for underfloor heating installation]
Damp Proof Membranes (DPM)
The subfloor must be completely dry and free from damp issues before installation.
If damp is present, consult a flooring or damp specialist before proceeding.
Where no existing damp proof membrane (DPM) is present within the subfloor, a liquid DPM may be required.
When applying a liquid DPM:
- Follow the manufacturer’s installation guidelines
- Allow the membrane to fully cure
- Test adhesive compatibility on a small area first
In some cases, spraying adhesive onto both the floor and the back of the panels may improve bonding performance over a DPM.
Alternatively, a skim layer of self-levelling compound may be applied over the liquid DPM before bonding the panels.
Levelling Uneven Concrete Floors
Concrete floors can become uneven over time through general wear and settlement.
Uneven subfloors can create:
- High and low contact points
- Poor board adhesion
- Floor movement or bounce
- Uneven finished flooring
Where necessary, apply a suitable self-levelling compound following the manufacturer’s instructions.
Before applying levelling compound:
- Remove skirting boards where required
- Remove doors if additional floor height clearance is needed
Once cured:
- Vacuum all dust thoroughly
- Ensure the floor is clean and fully dry before bonding boards
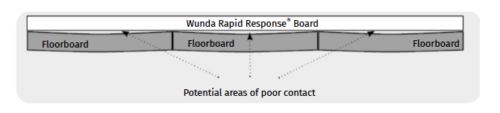
B) Preparing Existing Wooden Floorboards
Older timber floors can become uneven, loose, or creaky over time. These issues should be resolved before installing Rapid Response® boards.
Uneven timber floors may cause:
- Poor adhesive bonding
- Excessive movement
- Noise beneath the finished floor
- Uneven heat distribution
Initial Timber Floor Checks
Before installation:
- Replace any rotten or damaged floorboards
- Secure loose or squeaky boards using screws rather than nails
- Check for raised nail or screw heads
- Repair any plumbing or electrical issues beneath the floor
- Use a pipe or cable detector before fixing boards
Some installations may benefit from overlaying plywood sheets to create a more stable and level surface.
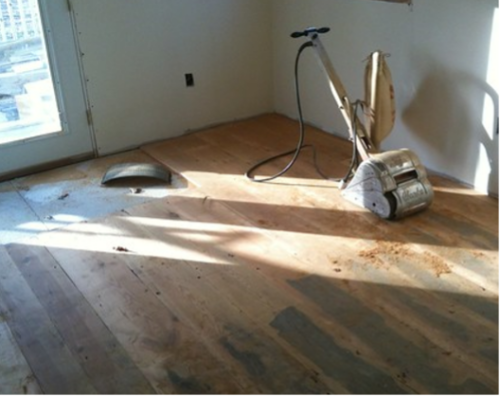
Levelling Timber Floors
Where floorboards are uneven, you may need to:
- Sand high spots
- Plane raised boards
- Install plywood sheets over the existing floorboards
A common solution is installing 6mm plywood over the timber floor after securing loose boards.
This helps:
- Improve floor stability
- Create a flatter installation surface
- Reduce movement beneath the Rapid Response® boards
Installing Plywood Sheets (Optional)
If plywood sheets are being installed:
- Lay plywood at a right angle to the existing floorboards
- Leave an expansion gap around the perimeter
- Fix sheets securely with appropriate screws or nails
- Stagger joints between sheets where possible
Using offcuts to begin new rows can help reduce waste and improve joint staggering.
Work progressively from the main doorway to avoid ending with narrow strips near thresholds.
C) Preparing Existing Tiled Or Non-Porous Floors
Rapid Response® boards can also be installed over existing tiled or non-porous surfaces.
Before installation:
- Thoroughly clean the floor
- Remove grease, dirt, and contaminants
- Ensure tiles are secure and stable
Poor surface preparation can reduce adhesive performance and affect board bonding.
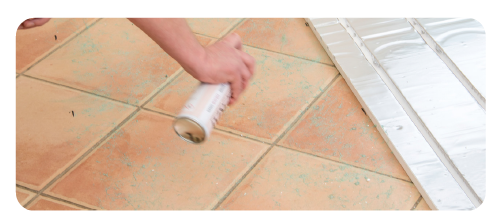
Cleaning Non-Porous Floors
Use a suitable degreasing solution, such as methylated spirits and wire wool, to clean the tiled surface thoroughly.
When applying adhesive:
- Spray adhesive onto both the tiles and the back of the boards
- Apply an even coat across both surfaces
- Allow adhesive to become tacky before bonding
Always test a small area first to confirm compatibility.
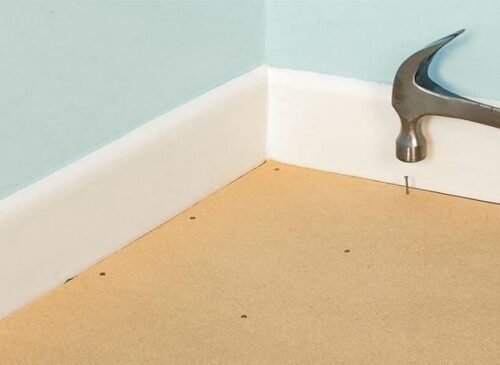
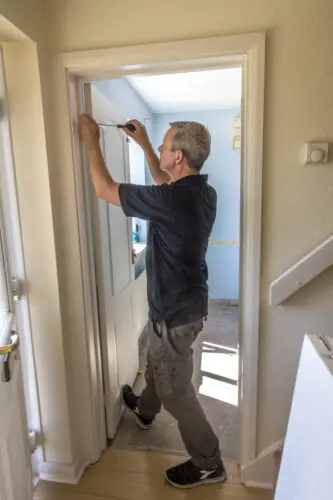
Step 3 – Remove Doors & Skirting Boards
Before installation begins, remove any skirting boards or doors that may be affected by the new floor build-up.
You may choose to:
- Remove skirting boards completely
- Leave skirting in place and trim where required
If skirting boards are removed:
- Repair any gaps or wall damage behind them
- Seal gaps before applying levelling compound if required
Removing doors in advance may also help prevent clearance issues once the finished floor height increases.
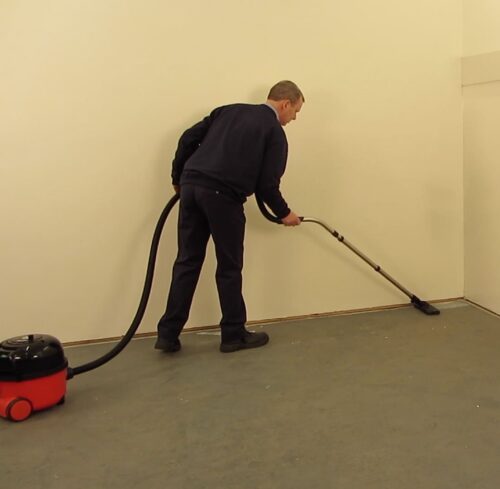
Step 4 – Ensure The Floor Is Clean & Dust Free
Before bonding any Rapid Response® boards:
- Vacuum the entire floor thoroughly
- Remove all dust and debris
- Use a damp mop if necessary to collect fine dust particles
Allow the floor to fully dry before applying adhesive.
Dust and debris can significantly reduce adhesive performance and affect board bonding.
Before starting installation, check that all required materials and tools are available.
Materials Supplied With Your Wunda Order
Depending on your system design, supplied materials may include:
- Digital pipe layout drawing
- WundaSpray adhesive
- Rapid Response® boards
- Transitional boards
- Wunda pipe
- Pipe cutter and reaming tool
- Perimeter strip
- Manifold and pump set
- Wunda controls
- Floor limitation probe
- Pipe conduit
Additional Materials Depending On Floor Finish
Additional installation materials may include:
- 3mm XPS breathable underlay
- 7mm Duo Boards
- Vapour barrier
- Fibre tape
The following tools may also be required:
- Face mask, gloves, and eye protection
- Straight edge and marker pen
- Fine tooth saw and craft knife
- Adjustable spanner
- Router with suitable routing bit
- Screws and wall plugs
- Rubber mallet and screwdriver
- Drain hose and bucket
- Masonry drill bit and hole saw
Optional Materials
Some installations may also require:
- 20mm or 16mm battens for carpet grippers
- Tile adhesive systems
- Primer and levelling compound
- Renovation screed
Always follow the adhesive and levelling compound manufacturer’s installation guidelines.
Common Mistakes To Avoid
Avoid the following common installation issues:
- Installing boards onto dusty surfaces
- Bonding onto damp or uncured floors
- Failing to secure loose timber floorboards
- Ignoring uneven areas within the subfloor
- Not reviewing the layout drawing before installation
- Applying adhesive before preparing all materials and tools
Correct preparation can significantly improve installation quality and long-term system performance.
Ready For Phase 2
Once the subfloor has been fully prepared and all materials have been checked, you are ready to proceed with Phase 2 of your Wunda Rapid Response® installation.
Careful preparation helps improve:
- Board adhesion
- Floor stability
- Heat transfer performance
- Overall installation reliability
These instructions are intended for use with Wunda systems only. Using alternative products or installation methods may affect system performance and could invalidate warranties.
Download Phase 1: Preparing For A Rapid Response® Installation